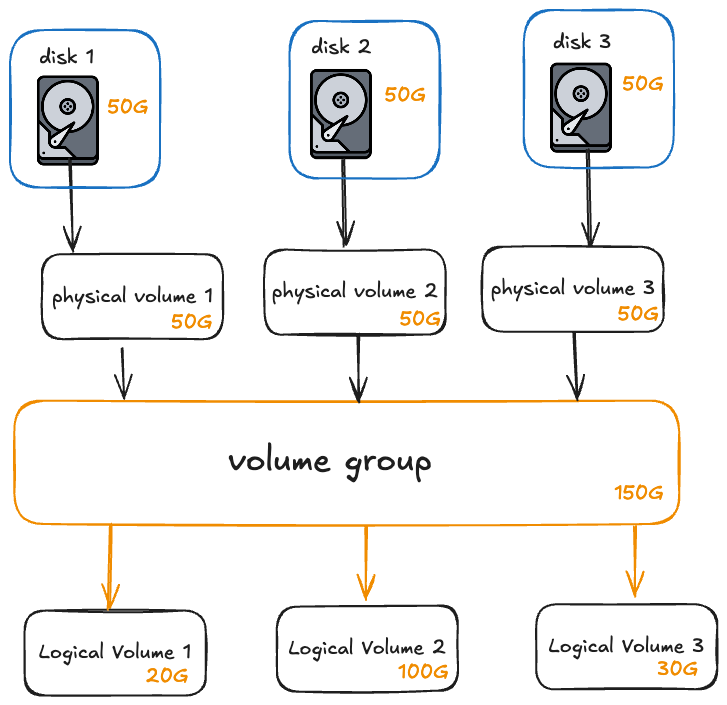
Logical Volume Management (LVM) is a feature in Linux that allows you to combine multiple physical disks into larger, flexible storage pools called Volume Groups. From these Volume Groups, you can create Logical Volumes that act like virtual partitions for storing your data.
Example: Imagine you have three separate disks, each with 1TB of storage. Using LVM, you can merge them into a single 3TB storage pool. This combined space can then be divided into Logical Volumes of sizes that suit your needs.
The Three Layers of LVM:
Physical Volumes (PVs):
These are your actual physical disks or storage devices.
Volume Groups (VGs):
Created by combining one or more Physical Volumes into a single storage pool.
Logical Volumes (LVs):
Virtual partitions carved out from the Volume Groups, which you can format and use to store data.

In this guide, we'll show you how to:
- Convert each of your disks into Physical Volumes.
- Combine these Physical Volumes into a Volume Group.
- Create Logical Volumes from the Volume Group for use in your system.
Prerequisites
- LVM should be installed on the system. Most systems come with LVM installed but if you system is missing it, you can install it with your packager manager. For exampe, in RHEL-based operating systems, you can use
yum:sudo yum install -y lvm2
Step 1: Identify Your Hard Drives
First, you need to find out the device names of the hard drives you want to use. You can do this by running the lsblk command, which lists all block devices (like hard drives and partitions) connected to your system:
lsblkThis command will display an output similar to:

In the output:
- The "NAME" column shows the device names (e.g., sda, sdb, sdc).
- These names represent the hard drives you can use to create Physical Volumes.
Disk Not Showing Up in lsblk Output?
If you've added a new disk to your system but it doesn't appear when you run lsblk, you might need to rescan the SCI Bus:
Rescan SCSI Bus (For SCSI, SATA, or SAS Disks):
sudo echo "- - -" > /sys/class/scsi_host/host0/scan
sudo echo "- - -" > /sys/class/scsi_host/host1/scan
sudo echo "- - -" > /sys/class/scsi_host/host2/scan
Note: Repeat for each hostX directory present in /sys/class/scsi_host/.
Check for Kernel messages:
dmesg | grep -i "disk" This will display recent kernel messages related to disks, which can provide clues.
Step 2: Create Physical Volumes
Physical Volumes are the foundation of LVM. They represent the actual hard drives connected to your system. Before we can use these drives with LVM, we need to initialize them as Physical Volumes.
Now that you know your device names, you're ready to initialize them as Physical Volumes in the next step.
:warning:Warning: Creating an LVM Physical Volume on a disk that already contains data will erase all existing data on that disk. The command we're about to run will format the drive, wiping out everything stored on it.
Before you proceed:
- Back Up Important Data: If there's anything you need on the disk, make sure to back it up to another location.
- Double-Check Disk Names: Ensure you're selecting the correct disk to avoid accidental data loss on the wrong drive.
Proceed with caution to avoid unintended data loss.
To create a physical volume out the first disk (xvdb):
sudo pvcreate /dev/xvdbOutput:
Physical volume "/dev/xvdb" successfully created.We just created a PV (Physical Volume) out of our first available disk (XVDB).
Note: You can also add disk partitions as physical volumes in LVM.
Let's create Physical Volumes out of the other two available free disks:
sudo pvcreate /dev/xvdc
sudo pvcreate /dev/xvdd
To view Physical Volumes in the system, run:
pvdisplaypvdisplay will show all physical volumes with their details:
[root@lvm-demo ~]# pvdisplay
  "/dev/sdb" is a new physical volume of "5.00 GiB"
  --- NEW Physical volume ---
  PV Name               /dev/sdb
  VG Name
  PV Size               5.00 GiB
  Allocatable           NO
  PE Size               0
  Total PE              0
  Free PE               0
  Allocated PE          0
  PV UUID               d9k4w6-nCZv-fJNA-UGm7-rQ4D-qsrE-7WvDja

  "/dev/sdc" is a new physical volume of "5.00 GiB"
  --- NEW Physical volume ---
  PV Name               /dev/sdc
  VG Name
  PV Size               5.00 GiB
  Allocatable           NO
  PE Size               0
  Total PE              0
  Free PE               0
  Allocated PE          0
  PV UUID               AQtIs5-mYW5-tEEn-XZrc-cFqJ-eEry-55mOqH

  "/dev/sdd" is a new physical volume of "5.00 GiB"
  --- NEW Physical volume ---
  PV Name               /dev/sdd
  VG Name
  PV Size               5.00 GiB
  Allocatable           NO
  PE Size               0
  Total PE              0
  Free PE               0
  Allocated PE          0
  PV UUID               MRU8iZ-Oiip-MIEG-DUb4-li15-LXxu-KsEoQl
Step 3: Create Volume Groups
Volume Groups (VGs) are the second layer in LVM, sitting on top of Physical Volumes (PVs). They allow you to combine multiple Physical Volumes into a single storage pool, making it easier to manage disk space across several drives.
Now that you've initialized your disks as Physical Volumes, you can group them into a Volume Group. Here's how to create a Volume Group called data_vg using the Physical Volumes from the previous step:
sudo vgcreate data_vg /dev/xvdb /dev/xvdc /dev/xvdd
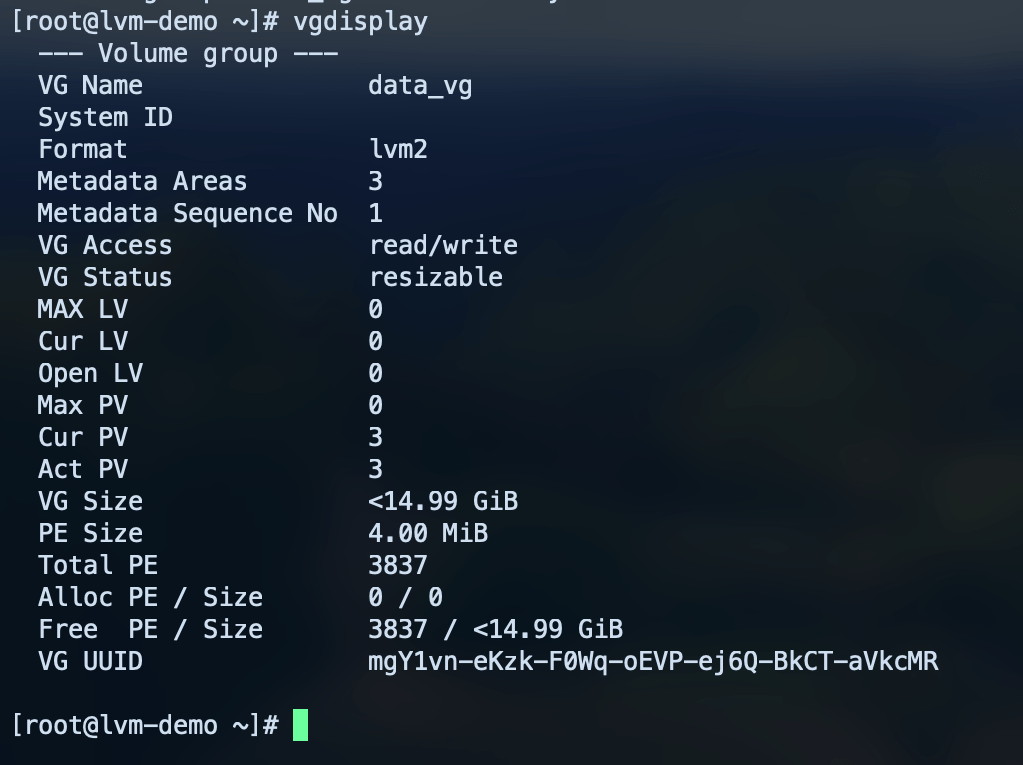
To see a list of Volume Groups, run:
vgdisplay
Step 4: Creating Logical Volumes
Now that you have a Volume Group (data_vg), you can create Logical Volumes (LVs) from it. Logical Volumes are like flexible partitions that you can format and use to store your data.
If you want to use all the free space in the Volume Group to create a Logical Volume named data_lv, run:
lvcreate -l 100%FREE -n data_lv data_vgExplanation:
lvcreate: Command to create a new Logical Volume.-l 100%FREE: Allocates 100% of the unallocated space in the Volume Group.-n data_lv: Names the Logical Volume data.data_vg: The name of the Volume Group you're using.

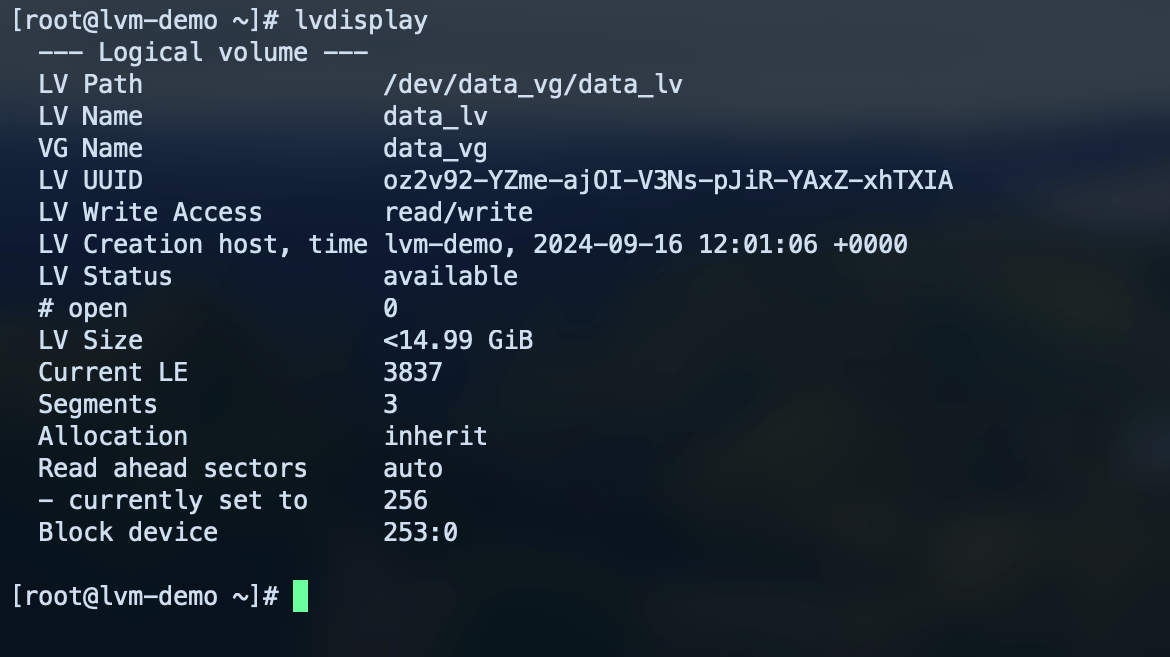
To see Logical Volumes in the system, run:
lvdisplay
You'll notice that the Logical Volume size is approximately 15 GB. This is because we've combined three Physical Volumes of 5 GB each into a single Volume Group, totaling 15 GB of storage. We then created one Logical Volume that uses all the available space in this Volume Group. Keep in mind, you don't have to use all the space in one Logical Volume—you can create multiple smaller Logical Volumes of various sizes, and you can have as many as you need, as long as there's enough free space in the Volume Group.
Creating a Logical Volume of a Specific Size
If you prefer to create a Logical Volume with a specific size, such as 100 Gigabytes, use:
lvcreate -L 100G -n data_lv data_vgExplanation:
-L 100G: Sets the size of the Logical Volume to 100 Gigabytes.- The rest of the command is the same as before.
Step 5: Format the Logical Volumes with File Systems
To make use of the Logical Volumes we've created, we need to format them with a file system so they can be mounted to specific directories on the system. The most common file system types in Linux are ext4 and xfs. Each file system type has its own method of creation and specific features. In this guide, we'll use the ext4 file system to format our Logical Volumes.
For creating the filesystem, we need the Logical Volume path. To get that, simply run lvdisplay:
lvdisplay
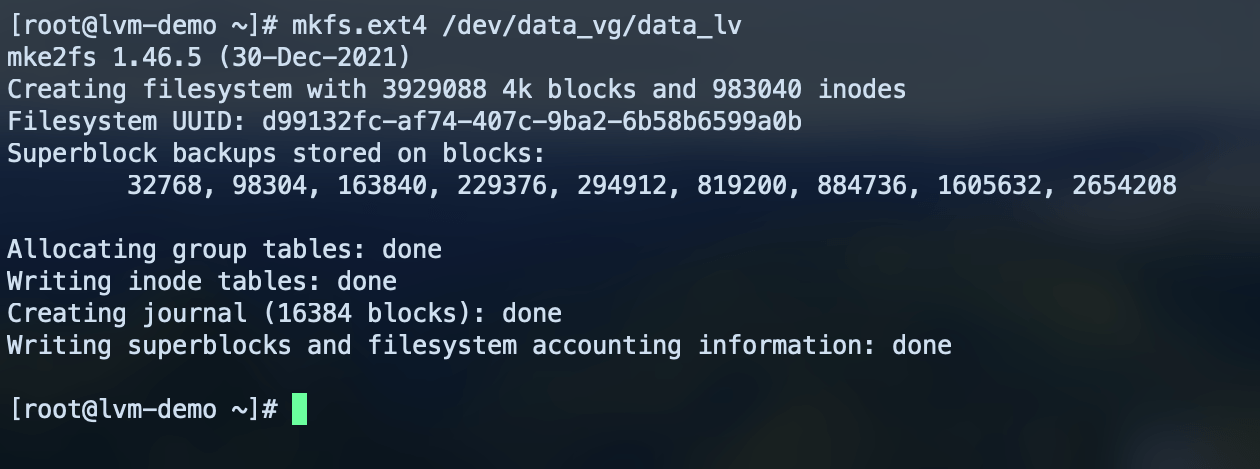
To make an ext4 filesystem out of our data_lv, we can run mkfs.ext4 command:
mkfs.ext4 /dev/data_vg/data_lvThe /dev/data_vg/data_lv is the Logical Volume path you can copy from lvdisplay output.

Step 6: Mount the Filesystem
Now that we've created a file system on our Logical Volume, we need to mount it to a directory to start using it. You can choose any directory as a mount point. In this example, we'll create a directory called /data and mount our file system there.
sudo mkdir /dataTemparory mount the new filesystem to /data
sudo mount /dev/data_vg/data_lv /dataIf you don't get any errors, the file system is mounted. You can verify it by using df command.
df -h /data
The filesystem will be unmounted on reboot. We can making the mount a permenant change by adding an entry to /etc/fstab file. But first, let's unmount it:
sudo umount /dataYou should see no errors when running that. You can verify whether or not it was successfully unmounted by running df command again.
Now you can open /etc/fstab file with your favorite editor (mine is Vim):
sudo vim /etc/fstabAnd add the following entry at the end:
/dev/data_vg/data_lv /data ext4 defaults 0 0Explanation:
/dev/data_vg/data_lvis the device name. In our case, this is the Logical Volume path/dataThis is the directory where you want to access the files on your Logical Volume.ext4: Indicates the type of filesystem used on the Logical Volume.defaults: These are settings that control how the filesystem is mounted. Usingdefaultssimplifies the setup by applying common configurations.0(Dump Option): This field is used for backup utilities. A0means means the filesystem won't be automatically backed up using the dump command..0(Filesystem Check Order): Determines if and when the filesystem is checked for errors at boot time. A0means the system won't check this filesystem during startup.
Save your changes.
Mount the filesystem entries in /etc/fstab:
sudo mount -aYou will see no output but if you check the result of df command again, our filesystem should be mounted under /data:

Conclusion
In this guide, we've explored how to create Logical Volume Management (LVM) volumes in Linux, providing you with a flexible and scalable way to manage your storage. You now have the tools to efficiently create volumes using LVM in Linux.


